Skip to content

Grade 10 · Core Mathematics · Lesson 8 of 21

Adding Vectors Geometrically in Different Situations

A Grade 10 Core Mathematics CBE lesson from the sub-strand Vectors I. In it, learners construct the geometric sum of two or three vectors using equivalent vectors on grid paper.

Strand Measurements and GeometrySub-strand Vectors ILesson code 10CM-28-L840 minutes · 2 slides

KICD learning outcome (e)

Add vectors in different situations.

By the end of this lesson, learners should be able to

  1. Construct the geometric sum of two or three vectors using equivalent vectors on grid paper.
  2. Determine resultant displacement vectors from sequential vector additions.

Key vocabulary

Resultant Vector
A single vector representing the combined total displacement of two or more added vectors.
The resultant vector a⃗+b⃗+c⃗ connects the first tail to the last head.
Head-to-Tail Chain
A method of linking vectors sequentially where each vector starts where the previous ends.
We form a head-to-tail chain to add three displacement vectors on grid paper.
Displacement Vector
A quantity specifying straight-line distance and direction from an initial to final location.
The displacement vector f⃗+e⃗ goes 2 units right and 1 unit up.

Lesson preview

Slide 1 · Adding Three Vectors GeometricallyModel · 18 min

To add three or more vectors geometrically, we apply the head-to-tail rule sequentially. We start by placing the tail of the second vector at the head of the first vector. Next, we draw an equivalent vector for the third vector starting at the head of the second vector. The final resultant vector spans directly from the initial tail of the first vector to the final head of the third vector, forming a single continuous path.

  • Geometric vector addition extends to three or more vectors using continuous head-to-tail chain connections.
  • Equivalent vectors preserve length and direction when shifted to start at the preceding vector head.
  • The resultant vector a⃗+b⃗+c⃗ directly joins the starting tail to the final head.
  • Order of vector addition does not alter the final single resultant vector length or direction.
Worked example. Start at an origin point P. Draw vector a⃗ moving 3 units right and 1 unit up to point Q. From point Q, draw an equivalent vector for b⃗ moving 1 unit right and 3 units up to point R. From point R, draw an equivalent vector for c⃗ moving 2 units right and 2 units down to point S. Connect point P directly to point S to form the resultant vector a⃗+b⃗+c⃗. Count the net grid steps from P to S: (3+1+2)=6 units right, and (1+3−2)=2 units up. Answer: The resultant vector a⃗+b⃗+c⃗ is a displacement of 6 units right and 2 units up from start to end..

Check question: If vector u⃗ goes 4 units right and 1 unit up, and vector v⃗ goes 2 units left and 3 units up, what grid displacement represents the resultant vector u⃗+v⃗?

  1. 2 units right and 4 units up
  2. 6 units right and 4 units up
  3. 2 units right and 2 units up
  4. 6 units right and 2 units down
Show answer

2 units right and 4 units up. Adding the horizontal components gives 4 units right and 2 units left, which is 4−2=2 units right. Adding the vertical components gives 1 unit up and 3 units up, which is 1+3=4 units up.

Slide 2 · Vector Addition Practice on Grid DiagramsPractice · 22 min
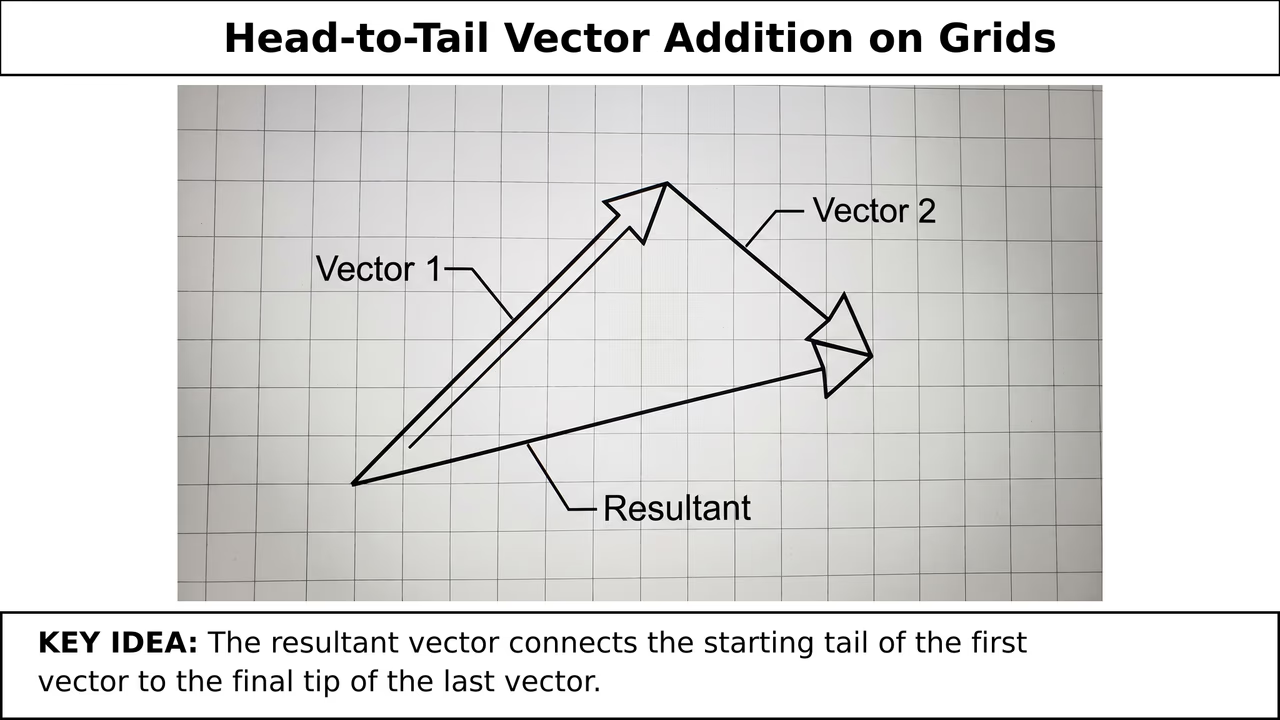
A grid diagram demonstrating the head-to-tail method for adding two vectors to find the resultant vector.
Figure 1: A grid diagram demonstrating the head-to-tail method for adding two vectors to find the resultant vector.

Teach the full lesson on the projector

This lesson, and every other Grade 1–10 CBE lesson, comes ready to project with the EAP ClassKit. It runs without electricity or internet.

  • Both slides with diagrams and class activities
  • Teacher notes, SNE adaptations and assessment checks
  • Homework and the other 20 lessons in this sub-strand

All 21 lessons in Vectors I

  1. 1Explaining Vector and Scalar QuantitiesExplain vector and scalar quantities with illustrations
  2. 2Using Vector Notations in Different WaysUse vector notations in different ways
  3. 3Representing Vectors GeometricallyRepresent vectors geometrically in different situations
  4. 4Representing Vectors Geometrically in Different SituationsRepresent vectors geometrically in different situations
  5. 5Identifying Equivalent VectorsIdentify equivalent vectors in different situations
  6. 6Equivalent VectorsIdentify equivalent vectors in different situations
  7. 7Adding Vectors GeometricallyAdd vectors in different situations
  8. 8Adding Vectors Geometrically in Different SituationsAdd vectors in different situations
  9. 9Multiplying Vectors by ScalarsMultiply vectors by scalars
  10. 10Multiplying Vectors by Scalars: Graphical Construction and Scalar RatiosMultiply vectors by scalars
  11. 11Determining Column Vectors from Coordinates and DiagramsDetermine column vectors in different situations
  12. 12Determining Column Vectors and Vector ArithmeticDetermine column vectors in different situations
  13. 13Determining Position Vectors from the OriginDetermine position vectors in different situations
  14. 14Determining Position Vectors and Calculating Vector DisplacementsDetermine position vectors in different situations
  15. 15Calculating the Magnitude of a VectorWork out magnitude of a vector in different situations
  16. 16Working Out Vector Magnitudes in Different SituationsWork out magnitude of a vector in different situations
  17. 17Determining the Midpoint of a VectorDetermine the midpoint of a vector in different situations
  18. 18Determining Vector Midpoints and Endpoint CoordinatesDetermine the midpoint of a vector in different situations
  19. 19Determining Translation Vector as a TransformationDetermine translation vector as a transformation
  20. 20Determining Translation Vectors as TransformationsDetermine translation vector as a transformation
  21. 21Appreciating Vectors in Real-Life SituationsAppreciate the use of vectors in real-life situations